Waxing skis at home is an easy and effective form of maintenance that improves gliding on snow, protects the base, and extends the life of your equipment – without the need for a professional service. With the right tools, suitable wax, and a bit of practice, any skier can perform this procedure independently at home.

What do you need to wax skis at home?
Preparation is key for a quality and long-lasting result. To perform waxing at home, it is necessary to have the following basic materials and tools:
- ski wax – universal or designed for a specific temperature range;
- special ski wax iron – specialized iron without holes that maintains a constant temperature;
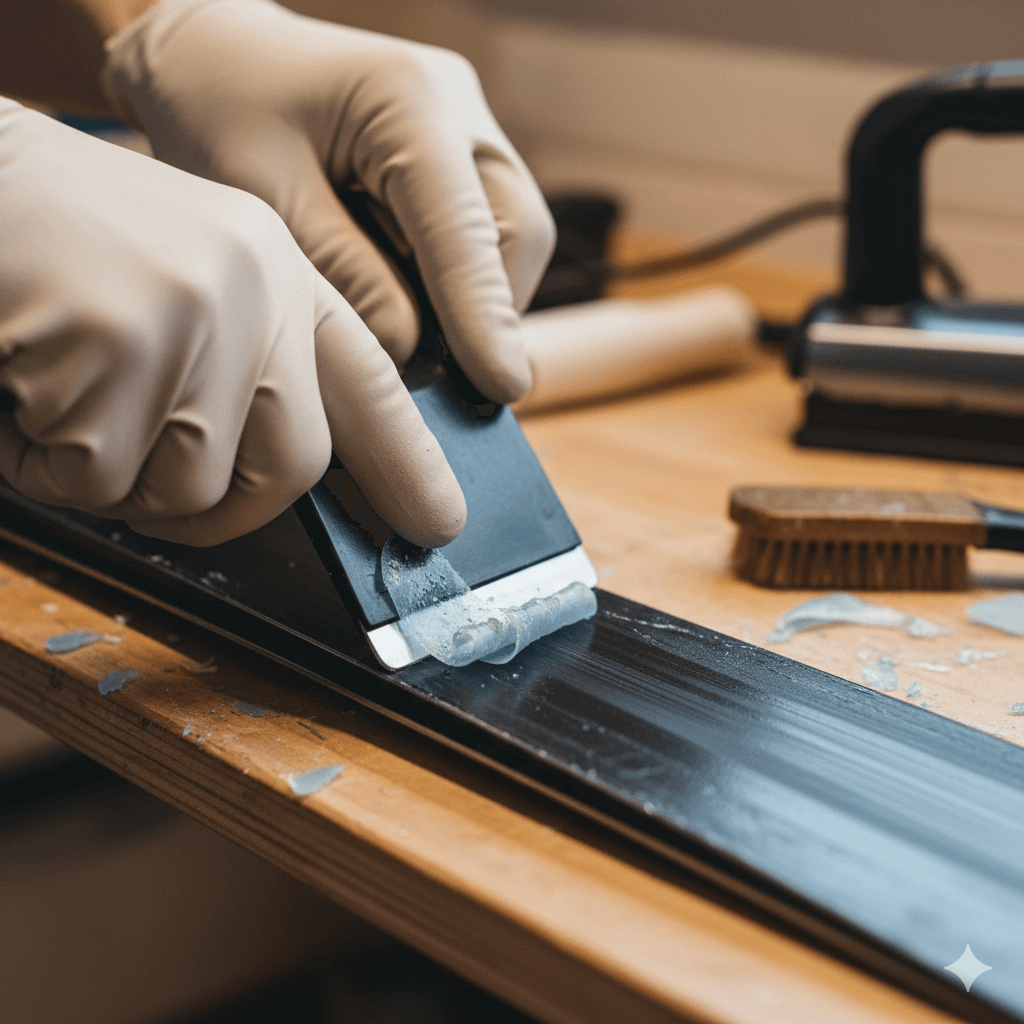
- scraper – for removing excess wax;
- brushes – bronze and/or nylon, for cleaning and polishing the base;
- stable work surface – a table, bench, or stand to fix the skis to.
.jpg)
Using appropriate tools facilitates the process and significantly reduces the risk of damaging the base.
Pro Tip: If you don't have a special iron, you can temporarily use an old home iron with temperature control. In this case, it is important to work carefully, as unstable temperatures can lead to overheating the base.
Which wax to choose according to snow temperature?
The choice of wax should be adjusted to the temperature conditions and snow type. Different formulas have different hardness and behavior upon contact with the snow surface:
| Snow Temperature | Wax Type | Characteristics | Suitable for |
|---|---|---|---|
| above 0 °C | Warm wax | Softer structure, resistant to wet snow | Spring conditions, heavy and wet snow |
| from -2 °C to -8 °C | Universal wax | Balanced glide and protection | Most common winter conditions |
| from -8 °C to -15 °C | Cold wax | Harder formula, less friction | Dry, cold, and hard snow |
| below -15 °C | Extreme cold wax | Very hard wax, maximum durability | Racing and high-mountain conditions |
Where and how to prepare for waxing?
The procedure should be performed in a well-ventilated room at room temperature. This allows the wax to cool evenly and penetrate the base structure better.
Before you start the actual waxing, it is important to prepare the skis as follows:
- clean the base of dust and dirt with a brush or a dry cloth;
- for heavy dirt or lost structure, use a bronze brush to refresh the base.
Good preliminary preparation ensures even wax application and a better final result.
Step by Step: How to wax skis at home?
1. Heating the iron
Set the iron to the temperature specified by the wax manufacturer, usually between 110 and 140 °C. The wax should melt smoothly without starting to smoke. A constant and controlled temperature prevents the risk of overheating the base.
2. Applying the wax to the base
There are two established application methods:
- "Drip" method – the wax is melted on the iron and dripped evenly along the length of the skis;
- Direct application – the wax is rubbed onto the base and then heated with the iron.
3. Spreading the wax
With smooth movements, move the iron from the tip to the tail of the skis until the wax is evenly distributed over the entire surface. Avoid holding the iron in one place.
4. Cooling the wax
After application, let the wax cool for a period of 15 to 30 minutes. During this time, it hardens and is absorbed into the base.
5. Removing excess wax
Using a scraper, remove excess wax, following the direction of the skis from the tip to the edges. The goal is for the wax to remain in the pores, not on the surface.
6. Brushing and polishing
After scraping, use a bronze brush to clean off residues, and then a nylon brush for final polishing.
How often should you wax your skis?
- for standard use – every 3 to 6 days of skiing;
- for intensive use – more often, according to the condition of the base;
- before and after the season – mandatory waxing before storage.
Tips and common mistakes
- do not leave the iron stationary on the base;
- always work in a well-ventilated room;
- use wax suited to the temperature range of the snow.
Conclusion: Waxing skis at home helps you maintain optimal glide and prevents unnecessary wear of the base.


